Log Analysis and Anomaly Detector Script
 Godwin
-
Oct. 24, 2025
Godwin
-
Oct. 24, 2025

When I first looked at a Bash script for analyzing SSH login attempts, it honestly felt too complex for me.
As a cybersecurity student aiming to become a SOC analyst, I wanted to understand logs and automation - but long scripts full of commands like awk, grep, and printf looked intimidating.
So instead of giving up, I decided to take it one line at a time.
This post documents my full hands-on learning process on how I created, tested, and finally understood my Bash Log Analyzer.
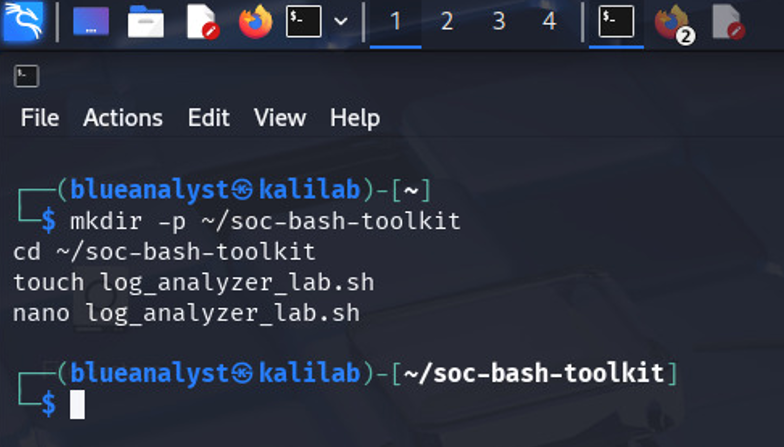
mkdir -p ~/soc-bash-toolkit
cd ~/soc-bash-toolkit
touch log_analyzer_lab.sh
This created an empty file called log_analyzer_lab.sh inside a folder named soc-bash-toolkit
Step 2: Beginning the Script
I opened the file in the nano text editor:
nano log_analyzer_lab.sh
Then I added the first few lines:
#!/usr/bin/env bash # Script: log_analyzer_lab.sh # Purpose: Bash script to analyze authentication logs and report failed SSH login attempts.Explanation:
#!/usr/bin/env bashtells Linux to use Bash to run this file.The
#lines are comments that describe what the script does — these don’t run; they just help humans understand the code.
Step 3: Adding Basic Variables
Next, I defined a few variables that the script will use later.
set -u  # stop the script if we try to use a variable that was never set
LOG_FILE="/var/log/auth.log"
SINCE="7 days ago"   # how far back to check logs (modifiable)

Explanation:
set -uprevents the script from running if it references an undefined variable (safer coding).LOG_FILEpoints to the system’s authentication log file.SINCEdefines how far back to look when using the system journal.
Step 4: Printing the Header
This section prints a friendly header and checks whether the log file is readable.
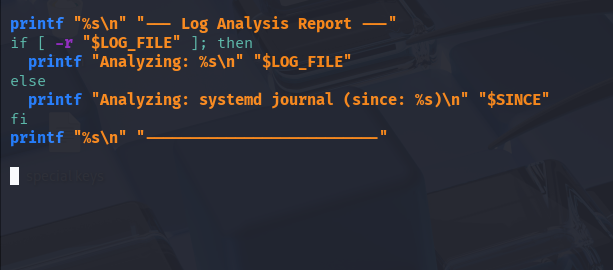
printf "%s\n" "--- Log Analysis Report ---"
if [ -r "$LOG_FILE" ]; then
  printf "Analyzing: %s\n" "$LOG_FILE"
else
  printf "Analyzing: systemd journal (since: %s)\n" "$SINCE"
fi
printf "%s\n" "--------------------------"
Explanation:
printfdisplays cleanly formatted text.[ -r "$LOG_FILE" ]checks if the file is readable.The script prints which data source it will use (the file or the system journal).
sudo bash ./log_analyzer_lab.sh
Expected output:
--- Log Analysis Report ---
Analyzing: systemd journal (since: 7 days ago)
--------------------------
Step 5: Adding a Helper Function
To make the script smarter, I added a small function that extracts IP addresses or hostnames appearing after the word “from” in log lines.
# Helper: extract the word that appears right after "from"
extract_after_from() {
  awk '{
    for (i=1;i<=NF;i++) {
      if ($i=="from" && (i+1)<=NF) { print $(i+1); break }
    }
  }'
}
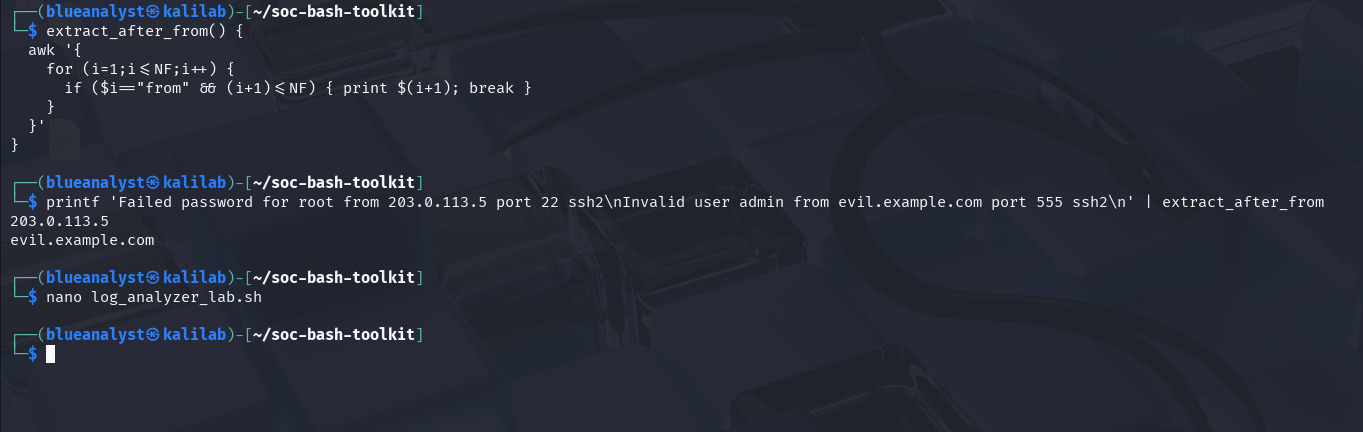
Explanation:
awkscans each word in a log line.When it finds the word from, it prints the next word — usually the attacker’s IP address.
printf 'Failed password for root from 203.0.113.5 port 22 ssh2\nInvalid user admin from evil.example.com port 555 ssh2\n' | bash -c 'extract_after_from() { awk '\''{for (i=1;i<=NF;i++){if ($i=="from" && (i+1)<=NF){print $(i+1);break}}}'\''; }; extract_after_from'
Output:
203.0.113.5
evil.example.com
Step 6: Top 10 Failed Login Attempts by Source
Now I added a block that finds the top 10 IP addresses or hosts with failed login attempts.
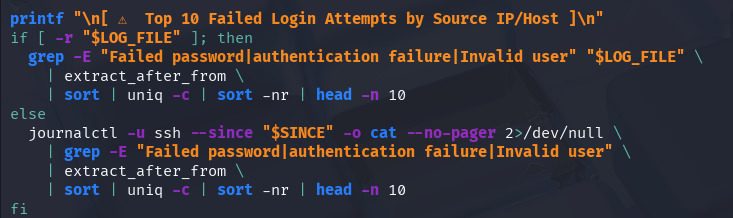
Explanation:
grepfilters failed-login lines.extract_after_frompulls the IP/host.sortanduniq -ccount occurrences.The final
head -n 10shows only the top 10 sources.
Step 7: Top 10 Usernames Targeted
Next, I added another section to see which usernames attackers tried most often.

Explanation:
awkextracts usernames following “for”.Handles both formats:
Failed password for rootInvalid user admin from …
Sorted and counted for the top 10 usernames.
output on my kali machine:
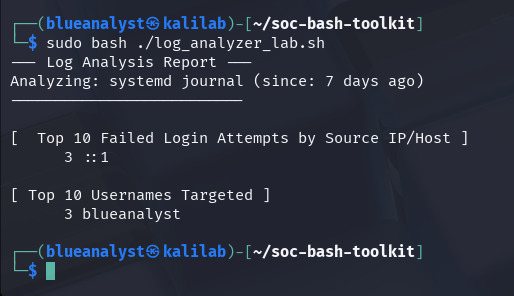
(::1 means localhost; it’s just my own login test.)
Step 8: What the Results Mean
::1 → local loopback (same as 127.0.0.1), meaning all failed logins came from my machine.
blueanalyst → the username I tested SSH with.
The numbers (like
3) show how many failed attempts occurred.
In a real SOC environment, this same script could reveal brute-force attacks, targeted users, and suspicious sources.
Step 9: What I Learned
Creating this script helped me understand how Bash can be applied to real log analysis tasks.
I learned how each part of a script connects, from setting variables and writing condition checks to using Linux tools for processing log data.
Here are my key takeaways:
I can now organize Bash scripts in a clear and logical way.
I understand how to use
sudo, variables, and conditional statements safely.I became more confident using text-processing tools such as
grep,awk,sort, anduniqfor analyzing logs.I saw how small commands can be combined to automate meaningful security tasks.
This project improved my troubleshooting skills, testing ideas step by step until I got the expected results.
Powered by Froala Editor
Comments (0)
No comments yet. Be the first to comment!